Showing posts with label bags. Show all posts

Thursday, June 23, 2011

a bag and some clutches

So you're probably thinking, "doesn't this girl have a life?
More bags, really?
The answer: no probably not. I mean there are things that
I really should be doing, but those are the un-fun things.
Laundry being at the top of my "should be doing but not wanting
to do them" list. (It's funny, that one always wins.)

I've had these vintage purse handles hanging around for a couple of
months now and I'm so glad I held onto them. They are just fun.
And these clutches while very simple in design, scream flirty...
maybe. (it sounded good anyway).

Oh, and aren't my model's feet just the cutest?! I love her
shiny red flats. I may need to snag me a pair.

Friday, May 20, 2011

Everyone needs a smashed ruffle tote

I'm officially a lover of bags. I love making, designing,
sporting and, stuffing them! My husband just rolls his
eyes now when he sees me donning a new bag...he also
usually mutters something about " this makes a million
and one" something sarcastic, semi true, and a little over
exaggerated. Lucky for him these bags are not for me.


I already made one for myself in yellow.....
that makes a million and two!


Monday, January 24, 2011

Lunch bag part 1 "Drawstring tote"

Today my kids forgot their lunches. So lucky me I got to
take them some food.

lucky for them I was in a super sewing mood!
Behold, "the drawstring lunch tote!"

I've been inspired lately by the cute Japanese lunch bags.

it's fun right?!

I'd like to say that I was able to take them
amazing lunches in these fun bags but alas, sigh....I didn't.

I did manage to finish them before they got home
though. Yessss, Score!


To make this tote you'll need:

* 1/4 yd fabric for the outside (I used corduroy)
* 1/4 yd coordinating fabric for the lining
* 1/8 yd fabric for straps
* natural twill tape or ribbon for drawstring
* 1 large safety pin

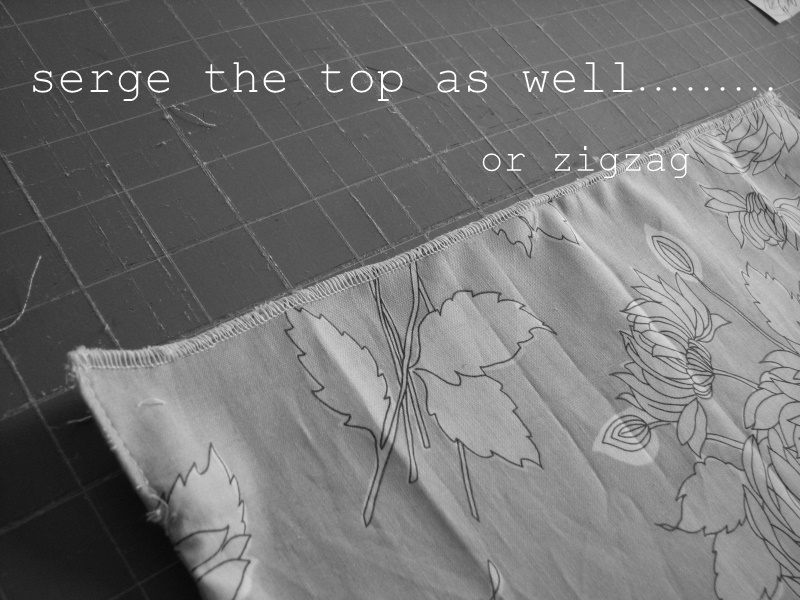
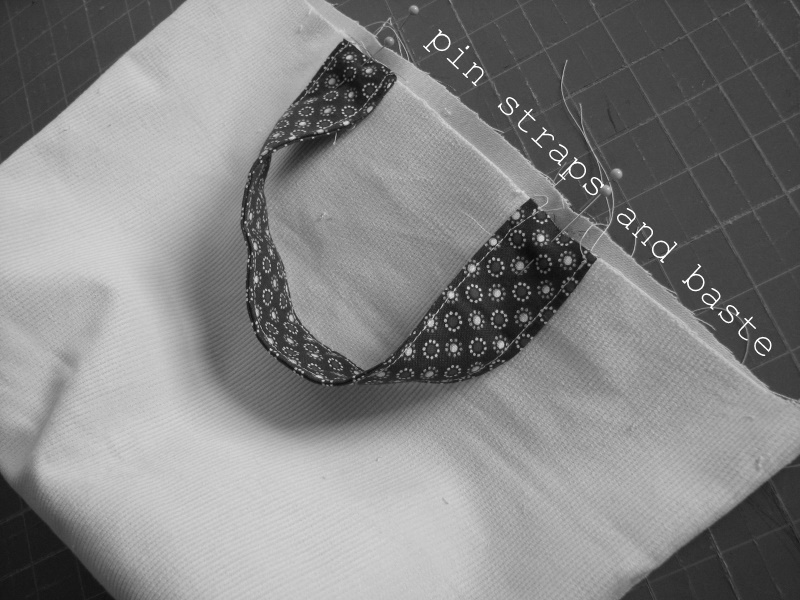
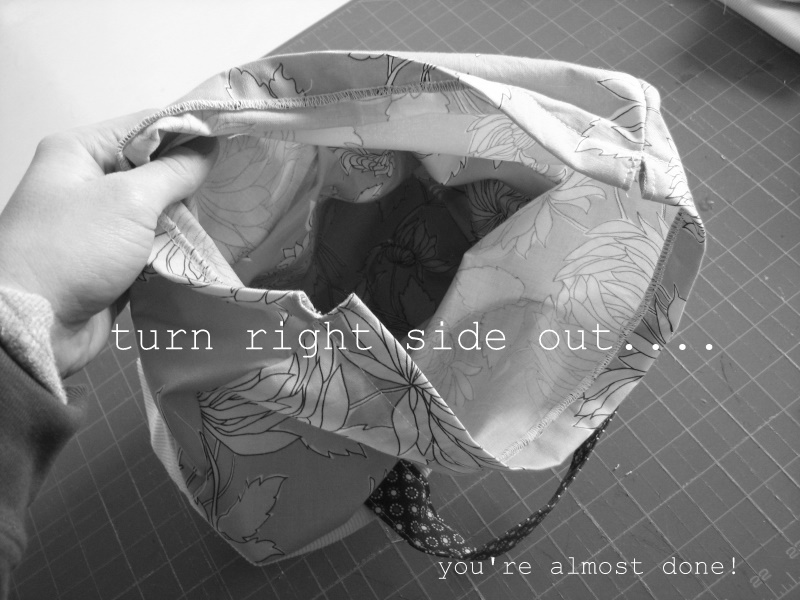
Follow the instructions on the pictures.
If my nonsensical wording doesn't make sense just email
me and I'll try to clarify.

Now I'm gonna warn you now, there are a lot of pictures.
So. many. pictures.


Okay, with right sides together, slip the lining over
the main body of the tote.


And don't you worry about those hungry
kids of mine....they just had to eat from an
old ugly bag that's all.

Monday, March 15, 2010

for camilla's happy birthday

I actually love this bag. It's been floating around
my cluttered brain for awhile, but it turned out
better than I thought it would. Don't be surprised
if you see more of these on this here blog.

I think I like yellow.

Monday, February 22, 2010

husband's jeans turned girly (this one's for you Aubrey)

My husband has a giant stack of hole riddled grubby jeans
that have tormented me for I don't know how long. So on
Friday I rolled up my sleeves and made a bag (surprise surprise).
DH teases that this bag brings the total to 1 million.
I think he's exaggerating.

and since I had nothing better to do I took tons of pictures
so I could produce a tutorial. If you have questions because
of my spastic directions just email me.

So you'll need the following:

a pair of ratty jeans or some cute Amy Butler fabric
(or whatever you want. This is your bag)

canvas (I used some old canvas curtains)

Coordinating fabric for the lining

1 biggish button

interfacing

Okay now do this:
Cut 2 of these
I pieced the straps because I couldn't get a long enough
piece. Just stitch along the short end and press the seam
open.
Make ruffles by using a loose basting stitch down the
center of each strip and gather by pulling a single thread.
Stitch ruffles and pocket.

Do the same with the lining. Now we're going to square
the corners. Pinch your corners like so:
now pin ém.

Stitch across the line.


Now Stitch!

Fold the loopy thing to make a sort of triangle in the
center. Stitch in place. Also, sew your button onto the
outside of your bag.

Stuff your lining into your bag, baste your straps and
loopy thing in their proper areas. Make sure your straps
are even and your closure will hold the button right.
Now for the exciting part. Stitch around the top of your
cute bag....aaaand your done!

I hung mine on my pantry door so that I could see it.....a lot.

I really like this one.

Monday, February 1, 2010

re-usable lunch bag


I've gotten to the point that I hate throwing things
away. My two oldest are in school and school lunch
is a ridiculous 2.95 (did I also mention that I'm cheap?).
So I've started making re-usable lunch sacks. I love them!
I basically used a paper lunch sack as a guide, but I wanted
to branch out and try something with handles. I've seen
people use laminated cotton, but honestly, I'd prefer just
using cotton lined with canvas. I have two reasons for this.

1. Cotton and canvas are more affordable (cheap like me!)

2. I can throw the bags in the wash no problem. While the
other can only be wiped down. Yogurt smeared bag bad.
Throwing yogurt smeared bag in washing machine good.

The fun thing about sewing these bags is I can be creative
and functional at the same time. I love functional stuff to
also be pretty. It makes me smile and my husband laugh.

Friday, January 29, 2010

sheet bag


This bag used to be a sheet. It's true! In fact, I
slept in it as a kid. I'll tell you a secret..............
I love old fashioned retro stuff! It makes me
happy. The sheets that I massacred....vintage.
Lovely, lovely vintage.

The bag? Easy. Sew two rectangles together, square
the corners, add a ruffle or two, and some handles
and ta-da! A bag is born. If there's any interest, I
would love to do a more detailed tute. But some of
you are probably already thinking I'm crazy for
cutting up a sheet to make a bag.


You're probably right!

Posted by Picasa