
We live in a lovely 1943 home. I adore it. Wood floors,
built in book shelves, pretty moldings.....small bedrooms..
..."scary wiring"(added by dear husband). Right now our
changing table is in the closet. Not very conducive for changing
bums. So I decided to use the dresser as a changing station.
The changing station isn't complete but I wanted to share my
upholstered changing pad with you.
What you'll need:
* plywood cut to desired size
* adorable fabric
* 1" thick foam
* 10 gauge clear vinyl
* staple gun
* chocolate....don't question me on this
Measure your dresser and decide how long and wide you
need your changing pad to be. Cut your foam so that it
overlaps 2" on all sides. Cut your fabric and vinyl so that
it is 2-1/2-3" longer on all sides.

Eat some chocolate and staple your foam in place on all sides of
the board.

go but if you use quilting fabric don't stretch too much. Just
enough to smooth the creases. Eat another bite of your treat.


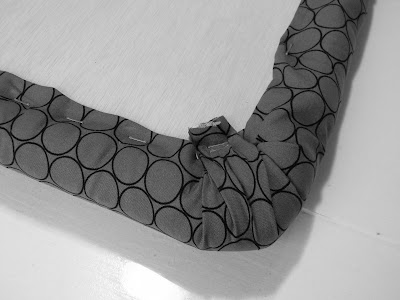
fabric near the corners and bunched it then I stapled the
gather in place....like so.

Then have some more chocolaty goodness.


the dresser to await a glorious upcoming event.


Wait, a glorious upcoming event?! Are you pregnant?! :)
ReplyDeleteHeavens no! It's referencing the glory of changing bottoms!! Sheesh. Pregnant...ha!
ReplyDeleteThis is great! I love this compared to a traditional changing pad. SO neat!
ReplyDelete