I love Thursdays. Husband works
Monday-Thursday every week (4 10's) and so in my mind Thursday marks the beginning of my weekend. In
light of that little bit of
randomness, Happy Thursday!!
Let's rewind back one and a half months.
So I get this email from a very nice lady saying she digs the scripture cover
on the ol' blog. She then proceeds to ask me if I would be willing to make some
for her church's book store. I say "Heck YES!" (not a direct
quote....I was much more professional) And so begins the supply shopping,
invoice making, and stressing. Wow! Random bit of fun-ness. Right?
Unfortunately this is all going down whilst I'm frantically trying to make
costumes for Halloween and get some stuff done for Christmas. That little bit
of fun-ness has turned into a big fat chore. So typical me I've procrastinated
and am on frantic mode again. In spite of this I've decided to waste some more
time to create this tutorial for you. That's how much I love you!! Now, be
aware that I kept forgetting to take pictures so I'm going to have to explain
in words how to do some steps.....this is really a simple project though so
you'll be fine. If you have questions though email me and I'll help you decode
the directions.
Okay, yes you need to do some simple math.
Measure your book top to bottom side to side. You'll need to measure the width
of the spine and add that to your "width" measurement. I then added an
inch each way for my seam allowance.
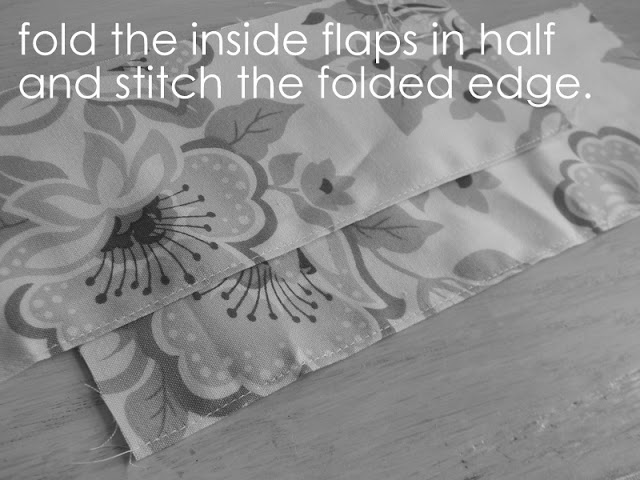
The interior flaps (aka: the little doohickeys that keep the cover
on the book) will be folded in half lengthwise. There's no real science to the
width measurement. They just need to be the same length top to bottom as the
main body of the cover.
Did I confuse the crap out of you? I'm
really good at explaining things in a nonsensical way. This really is such a
simple project though. Once you get the pieces cut out you'll be able to see
how they're supposed to go together. E-mail me with questions if you have them.
Happy Thursday!


Awesome! I've been waiting for this one . . . it would make such a great Christmas gift. And you have a new blog look--I love it! Thanks for the tutorial :-)
ReplyDeletethis is a splendid idea, Would luv for my readers to see this awesome idea, will you please join our weekly party at
ReplyDeletehttp://www.passionatelyartistic.com/2011/11/thanksgiving-showcase-tutorial-with.html
have a great crafting weekend!
Maggie
http://passionatelyartistic.com
Thanks for the tutorial! I'm going to give this a try!
ReplyDeleteI LOVE this! I would love if you would share this at the Crazy Cute link party happening at Between U & Me right now! I've got a totally awesome giveaway this week, too!
ReplyDeleteOOH! AND, I'm your newest follower! ;)
www.betweenuandme.com
I just found you on Tatertots & Jello. You have so many cute projects!! I LOVE these Scripture covers! They're so sweet! I would love if you would link up to my Handmade Gift Directory.
ReplyDeletehttp://thelittlegiggler.blogspot.com/2011/11/handmade-gift-directory.html
Have a great weekend!
What a great idea! I wish I could make one of these for my Mom! You should come and enter my Vanilla Bean Paste giveaway! http://eatcakefordinner.blogspot.com/2011/11/vanilla-bean-paste-giveaway.html
ReplyDeleteWhat a gorgeous project - thanks for sharing exactly how you made it.
ReplyDeleteVisiting from TT&J - new follower!
Lowri
http://papervinenz.blogspot.com/
that looks so cool! I love this project!
ReplyDeleteThis is beautiful! And so simple! I love it. Your tutorial is awesome and easy to follow- thank you! We would love to have you stop by and share this at our link party:
ReplyDeletehttp://sixsistersstuff.blogspot.com/2011/11/strut-your-stuff-saturday-week-21.html
Have a great weekend!
Camille @
SixSistersStuff.com
Fab! You could also add a little loop on the other side of the book cover (opposite from the tab closure) so you have somewhere to store a pen/pencil/highlighter. You could get ambitious, too, and put it on the inside of the tab closure. That would be cute, too!
ReplyDeleteJust made this for my mother for Christmas. She said that it was the best gift she had ever gotten. Thank you so much for the idea and tutorial :)
ReplyDeleteI found you & this project on pinerest but do you have a newsletter I could get besides following you on pinerest?
ReplyDeleteI just got a new set of scriptures and I'm going to do this! How about adding some thin coordinating ribbon at the top for book-marking?
ReplyDeleteHi I found your tutorial via pinterest and it is so cute! I want to make one for a friend who has been coming to church with me, but I'm clueless in the sewing world. I don't suppose you have a video tutorial on this or would be willing to make one? I would appreciate any help on this, thanks so much!
ReplyDeleteMerci beaucoup! :-)))
ReplyDeleteThis was exactly what I was hoping for when I searched Pinterest. Thank you. I made a nice black leather one to go with the Bible I got for my boyfriend for our first Valentine's Day together!
ReplyDeletethis is so cute but im so confused! I only know how to make pillows please help!
ReplyDeleteMade two for Christmas gifts . . .Love these!
ReplyDeleteThis is great!!
ReplyDeleteGod is so good cuz I just told my husband tonight i wanted to work on a pattern for bible covers tomorrow after church!!!
ReplyDeleteThank you for offering a truly free pattern and not going thru 10 pages to get it. I look forward to making the Bible cover.
ReplyDelete