Showing posts with label Tutorial. Show all posts

Friday, June 3, 2011

Big pocket skirt Tutorial


I've decided that I like skirts. They're perfect for
summer. So breezy and pretty. I need more. Here's one
that I made out of some cotton seersucker. Left overs
from baby boy's pants. Aww, match-y match-y! Cute.
Oh, and in case any of you were wondering, my legs are
so white because I'm wearing white stockings....ya, I only
wish I were wearing white stockings. They're just really that
mayo-ish. sigh-

What you'll need for this project:

1 - 2 yards of cute fabric
1/4 yard coordinating fabric (for the pocket lining)
1 -7" zipper
2 covered buttons
interfacing

The first thing you need to do is measure your waist where
you want the skirt to sit. I wanted mine up at my natural waist
line. Your skirt panels should be anywhere from one and a half
to two times your waist measurement. Then of course your waist
band should be 4 inches by whatever your waist plus one inch.
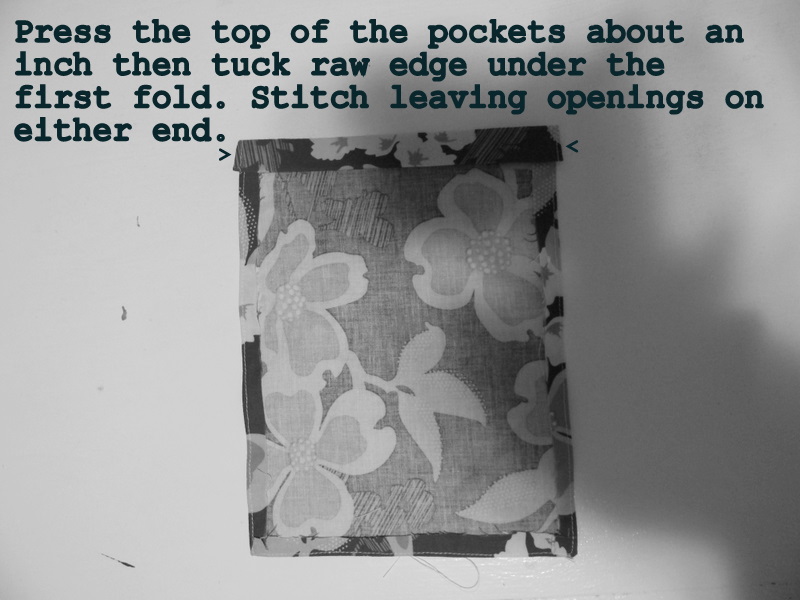
My pocket is eleven inches tall, 9-1/2 inches wide and the cut
out bit comes down 4 inches. (gosh, I hope I'm either making
sense or that you're having a nice nap!)


Turn pockets right side out.


Sunday, April 24, 2011

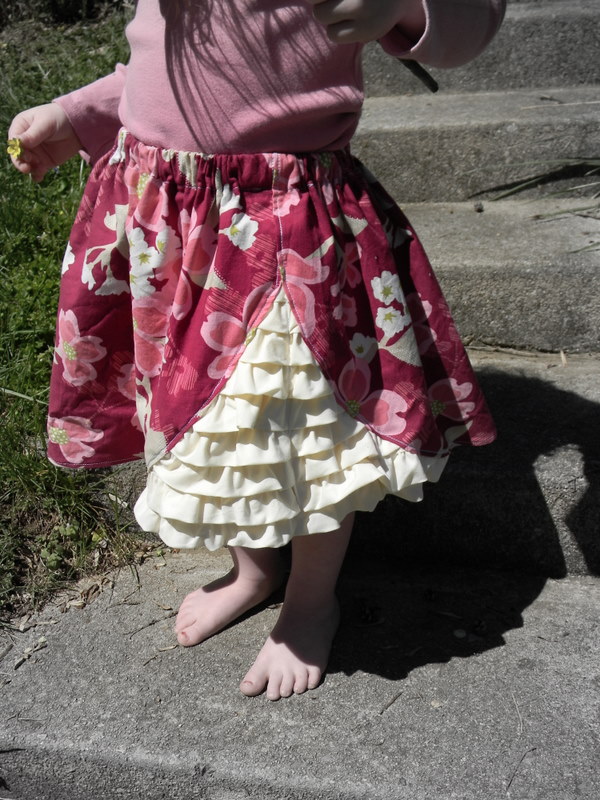
A sneaky peeky ruffle skirt with tutorial

This is my little princess. I've mentioned before that she's the
epitome of girly.

This skirt was designed just for her....
because let's face it, this skirt is dripping girlishness!
Funny thing, when I gave it to her she immediately dubbed it her
"Cinderella" skirt.
Here's what you'll need for this project:

1/2 yard of fabric*
1 yard ruffles**
1" elastic


* this tutorial is for a 4T skirt. Adjust length and width according
to your needs.
** For the ruffles I cheated and used pre-made, but you can make
your own.

Cut your skirt panel on the fold. Then cut a curved edge. Cut
another piece and cut and inverse curve (so that they fit together)


And that's it! Not too bad huh? Oh, and in case you're wondering
she really loves this skirt. She wore it for 2 days straight. Gross?
Maybe. Worth it? Absolutely!

Wednesday, April 6, 2011

Giant pocket skirt tutorial


My 3 year old is all pink, all dresses, all princesses
all of the time! The cute jeans and pants I saved from
my other two girls wouldn't fly with her. So, I'm on a
mission to change out her jeans with skirts.
She's my last girl and I figured why not!

Here's what you'll need to make a 3T-4T skirt :

1/2 yard of fabric*
1/4 yard coordinating fabric (pockets)
1 inch braided elastic
3/8 inch elastic
bias binding

(excuse half of the pictures...I started this project before
my kids woke up for school....ya oober early!)


So that's it! Have fun and stay tuned for more skirt-y fun!

Friday, March 11, 2011

Changing station part 1 *upholstered changing pad*

We live in a lovely 1943 home. I adore it. Wood floors,
built in book shelves, pretty moldings.....small bedrooms..
..."scary wiring"(added by dear husband). Right now our
changing table is in the closet. Not very conducive for changing
bums. So I decided to use the dresser as a changing station.
The changing station isn't complete but I wanted to share my
upholstered changing pad with you.

What you'll need:

* plywood cut to desired size
* adorable fabric
* 1" thick foam
* 10 gauge clear vinyl
* staple gun
* chocolate....don't question me on this


Measure your dresser and decide how long and wide you
need your changing pad to be. Cut your foam so that it
overlaps 2" on all sides. Cut your fabric and vinyl so that
it is 2-1/2-3" longer on all sides.

Eat some chocolate and staple your foam in place on all sides of
the board.
Now, grab your fabric and do the same. Sort of stretch it as you
go but if you use quilting fabric don't stretch too much. Just
enough to smooth the creases. Eat another bite of your treat.
I wanted my corners to look rounded so I just grabbed the
fabric near the corners and bunched it then I stapled the
gather in place....like so.
After you've stapled your fabric do the same with your vinyl.
Then have some more chocolaty goodness.
And admire your handiwork.
Then eat the last of your chocolate and place this puppy on
the dresser to await a glorious upcoming event.

Tuesday, March 1, 2011

Monogrammed ruffly cuff tutorial

I made these little cuffs for my girls on Valentine's
day. They really have enjoyed them so I thought
I'd share how I made them. They're super simple
and use very little fabric. My tutorial is basically the
pictures so if you have a problem with anything just ask!
I wanted to leave my edges raw so that it would look a
little shabby.....because that's what I am!

What you'll need for this project:

* Some scraps of cute fabric
* elastic
* a pack of covered buttons (this includes the tools to set them)

Here's a fun tip: To make the edges of your ruffle strip really
shabby, measure an inch wide then snip with your scissors and
rip. If you have good fabric this should deliver a perfect inch
wide strip. It's true!!


Okay, follow the instructions on the package of your
covered button kit and make some cute buttons. I love
love love, fabric covered buttons now!

Whoops! I meant an outline stitch. I will never proclaim to
be an embroiderer! Here's a little how to or, you can fake it!


And there you have it! A pretty little thing for your pretty
little thing. Have fun and enjoy!